Best Way Sewer & Drain Service
| 5 stars | | (1) |
|---|
| 4 stars | | (1) |
|---|
| 3 stars | | (0) |
|---|
| 2 stars | | (0) |
|---|
| 1 stars | | (0) |
|---|
|
Category: Other
Contact Information
44321 N 11th St, New River, Arizona, United States, 85087
Phone number: 623-516-9888
bestwaysewerphx.com
|
|
Best Way Sewer & Drain Service Reviews

|
LINDA01
December 18, 2023
Installing linear shower drain
Guide to Installing a Linear Shower Drain for a Stylish and Functional Bathroom:
Installing a linear shower drain is a rewarding project that not only enhances the aesthetic appeal of your bathroom but also ensures efficient water drainage. Here's a step-by-step guide to help you with the installation process:
Materials and Tools You'll Need:
Linear shower drain kit
Waterproofing membrane
Thinset mortar
Trowel
Level
Screws
Screwdriver
Pipe wrench
PVC primer and cement
Waterproofing sealant
Grout
Tile saw
Silicone caulk
Step 1: Measure and Plan:
Measure the shower area to determine the appropriate placement of the linear drain. Ensure that it is strategically located for effective water drainage.
Step 2: Prepare the Subfloor:
Ensure the subfloor is level and clean. Use a leveling compound if needed to create a smooth surface for tile installation.
Step 3: Install the Shower Pan:
If you haven't already installed a shower pan, follow the manufacturer's instructions for your chosen type. Apply a waterproofing membrane to protect the subfloor.
Step 4: Position the Linear Drain:
Place the linear drain at the desired location, making sure it aligns with the slope of the shower floor. Use a level to ensure it is perfectly horizontal.
Step 5: Cut the Drain Channel:
If necessary, use a tile saw to cut the floor tiles to accommodate the linear drain channel. Ensure a snug fit for the drain.
Step 6: Attach the Drain Body:
Connect the linear drain body to the waste pipe using PVC primer and cement. Use a pipe wrench to tighten the connections securely.
Step 7: Apply Thinset Mortar:
Apply thinset mortar to the subfloor and the surface of the linear drain channel. Ensure even coverage.
Step 8: Install the Linear Drain Grate:
Place the linear drain grate onto the channel, ensuring it sits flush with the surrounding floor tiles. Press it into the thinset mortar.
Step 9: Set the Tiles:
Install the remaining floor tiles, extending them over the linear drain channel. Use spacers to maintain even tile spacing.
Step 10: Grout the Tiles:
Once the thinset has cured, remove spacers and grout the tiles. Wipe away excess grout with a damp sponge.
Step 11: Apply Waterproof Sealant:
Apply a waterproof sealant around the edges of the linear drain to ensure a watertight seal. This is crucial for preventing leaks.
Step 12: Caulk the Edges:
Apply silicone caulk around the edges of the linear drain where it meets the tiles. This provides an additional layer of protection against water infiltration.
Step 13: Final Checks:
Double-check the alignment of the drain, ensure proper water drainage, and inspect the overall installation. Make any necessary adjustments.
Congratulations! You have successfully installed a linear shower drain, creating a sleek and efficient drainage solution for your stylish bathroom. Always follow the manufacturer's instructions and local building codes throughout the installation process.
|
|
|
bestwaysewe
August 12, 2019
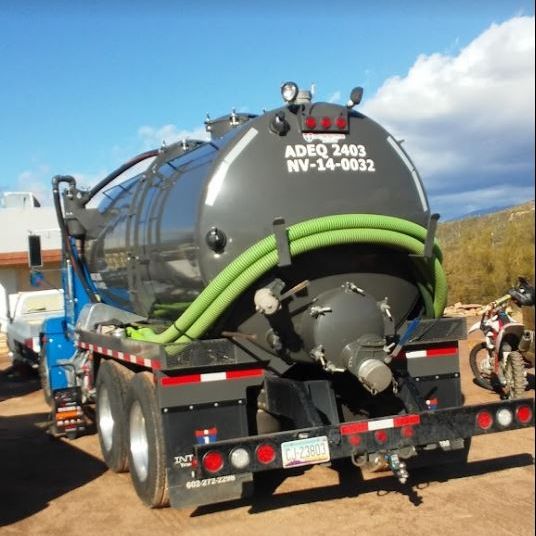
Best Way Sewer & Drain Service
Septic Pumping in New River, AZ
|
|
RECENTLY UPDATED REVIEWS
American Lifeguard Association
EXPERIENCE, TRUST, EXPERTISE
ICO Construction & Remodeling Kitchen & Bath Plano TX
Premier MedSpa Services in Hollidaysburg, PA
Just Nail it at Glamour Nails & Spa
Reliable Slip Resistant Shoes and Great Service
REQUESTED REVIEWS
REVIEWS BY CATEGORY
|